
Your first map
This section walks through a small melee map from start to finish. Everything here is covered in more depth in the sections that follow.
1. Make the map#
Ctrl+N opens New Scenario. Pick a tileset — each is shown as its own ground — a size, and how many players. The terrain list under the size is what the whole map is filled with, and the preview shows the result at its real scale. Place automatically (off by default) lays down one start location per player in a ring; tick it for this map.
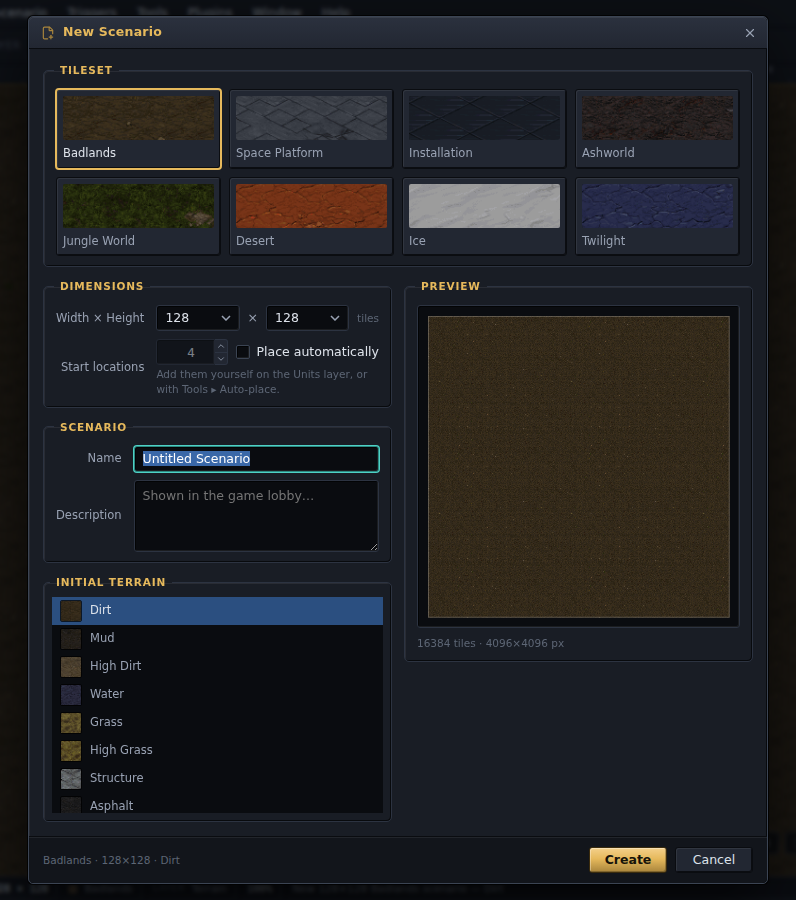
Give the map a name and a description — both are what players see in the game lobby — and press Create.
2. Shape the ground#
Stay on the Terrain layer and the Isometric tab. Pick High Dirt (Badlands; every tileset has a high ground of its own), set the brush to 3×3, and drag across the map. The cliffs around the high ground are laid for you, and where a stroke meets a terrain the new one cannot touch, the terrain in between is put in. Painting Water works the same way and gives you a shore.
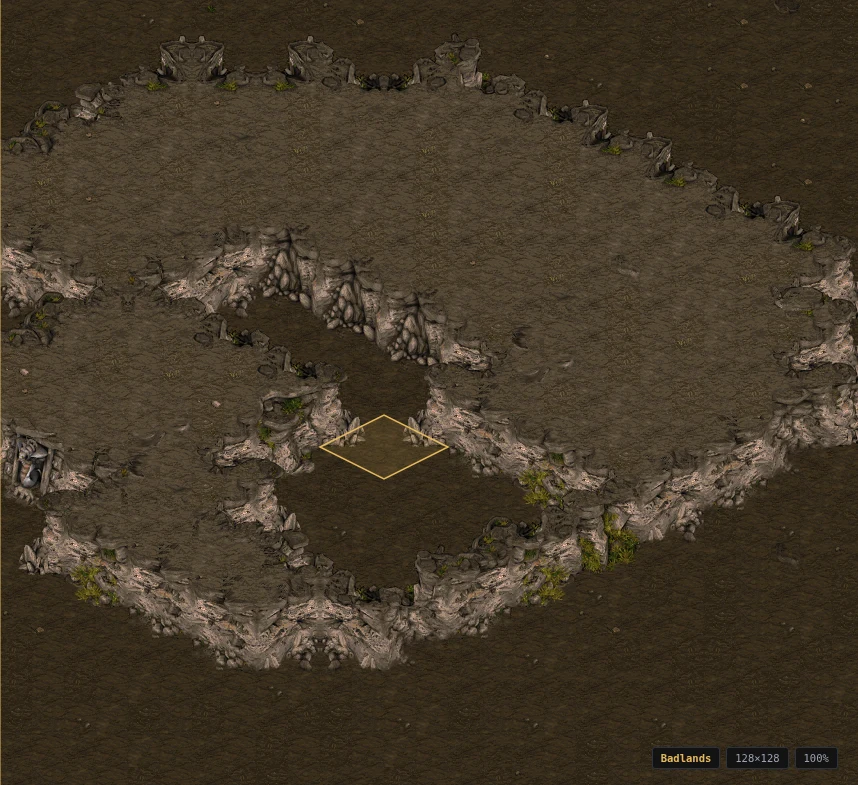
The brush size keys are [ and ]. Alt+click picks the terrain under the cursor.
Ctrl+Z takes back the whole stroke.
Ramps are not terrain: they are on the Doodads layer. Type ramp in its search box
to list them, click one, and click on a cliff edge; the ghost is red until the footprint
sits on ground it fits.
3. Place the bases#
Switch to the Units layer (U). The start locations are already there. In the
palette, Special holds Start Location and Resources holds the mineral fields and
the Vespene Geyser, or type a name in the search box. Click a type to arm it, then click
on the map to place; Esc or a right-click stops placing.
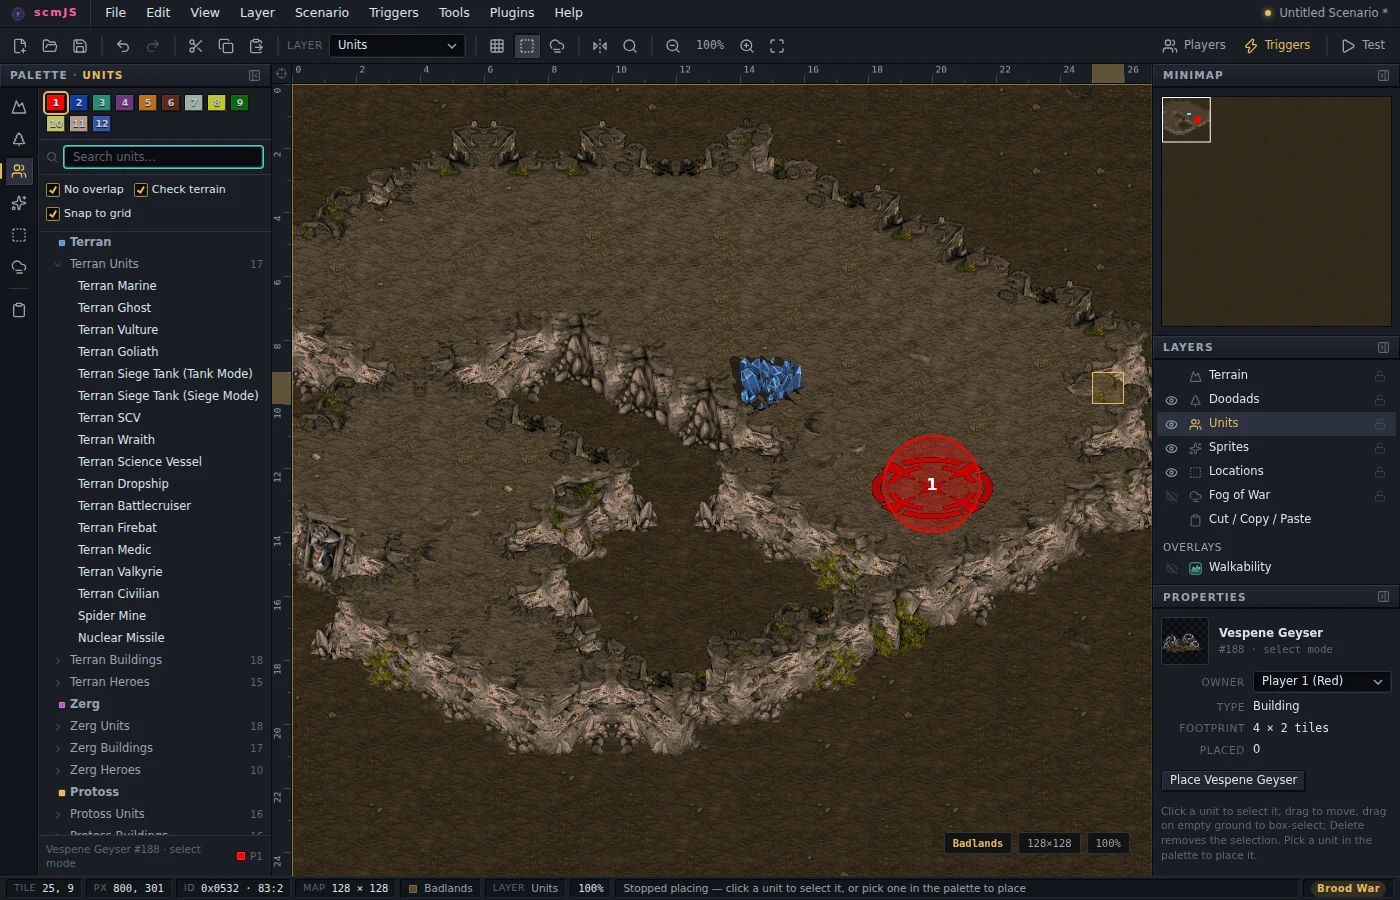
A mineral field holds 1500 minerals and a geyser 5000 gas when placed; double-click one to change the amount, or select a whole line and set them all at once. Eight fields and one geyser is the usual main.
Snap to grid keeps buildings and resources on the tile grid where the game expects them. The two ticks above it are the game's own placement rules; a red ghost means the game would drop the unit when it loaded the map, and the status bar says why.
For a symmetric map, Tools ▸ Symmetry mirrors what you paint and place across the axis you choose. The Melee Wizard plugin (Plugins ▸ Browse Plugins…) lays out whole bases with the mineral line at the distance the game mines fastest from.
4. Check the players#
Scenario ▸ Player Settings is where each slot's controller, race and colour live. A melee map needs Human and User Selectable on every slot that has a start location; that is what a new map is set to already. Force Settings groups them into teams for the lobby.
A Use Map Settings map is different: give each player a fixed race there. A player left on User Selectable is treated as a melee player by the game, which hands them a base and workers at their start location and removes every unit you placed for them. Units of a human slot that nobody takes in the lobby are removed too, so put decorations such as beacons on Player 12, the neutral one.
5. Check the map#
Tools ▸ Check Map lists what the game would object to: a start location with no player, a unit off the map, too many units, and so on. Double-click a line to go to it.
View ▸ Walkability (Ctrl+Shift+W) draws the ground as a unit sees it: which areas connect, where the chokes are and how wide, and which pockets cannot be reached at all. It updates as you edit.
6. Save and play#
Ctrl+S saves. A new map opens the Save dialog the first time, where the name and the
file format are chosen; .scx is a Brood War map. From then on Ctrl+S writes the file in
place (Chrome, Edge, the desktop app) or downloads it (Firefox, Safari) — the notice at
the bottom right says which.
Ctrl+F5 is Test Map. Neither StarCraft build opens a map handed to it from the outside,
so the editor writes the map into a scmJS folder under the game's Maps folder, where
Single Player ▸ Custom Game lists it; the desktop app then starts the game as well.
That is a playable melee map. Triggers, briefings, custom unit settings and everything a "Use Map Settings" map needs are in the sections below.